This method of rooting applies to all Android One
Smartphones and in just few clicks, your device is going to be rooted.
Requirements
==>PC
==>Updated version of Microsoft.net framework or download
here
==>Your Android device must be charged at least 50%
How Can I Root Android One Devices?
==> Enable USB debugging on your Device by going to
Settings>>Developers Option>>USB Debugging>>Tick Enable.
Developers Option is hidden for Android 4.2.2 or above, to
show this option Go to Settings >
About Phone > Built Number (Tap on it for 5).
==>Download and extract Android One Toolkit on your PC
here
You should see the following files in the extracted folder

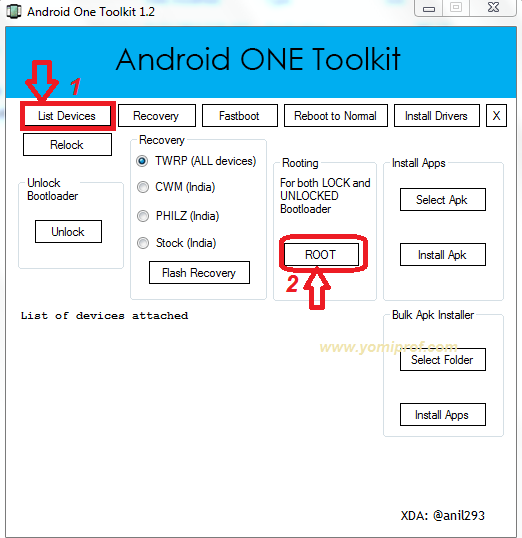
==>Double click on Android One tookit as seen in the
image below

==>Click on install driver to install Android USB drivers
on your PC. It will bring out a pop up to allow the installation, just click
Yes.

==>Connect your Android device to your computer
==> Click on List Devices
(to see whether your device is connected to the computer successfully). If its
connected successfully and you can see your device, then Click on Root
==>Once rooting is completed, disconnect your device from
your PC and restart it in normal mode.
Go to your app drawer once your device has been restarted,
and you should see Super User icon to confirm that it has been successfully rooted.
Are you still confuse? Ask your question using the comment
box.